Writing custom eslint rules
In this article, I’ll outline how to write custom ESLint rules and why they can be a game-changer for your development team.
What is ESLint?
ESLint is a powerful open-source static code analysis tool designed to help developers maintain consistent code quality and style in JavaScript and TypeScript projects. By analyzing code for potential issues, enforcing best practices, and catching errors early, ESLint ensures cleaner, more maintainable codebases. It’s highly customizable, allowing you to use pre-defined rules or create your own to fit specific project or team standards.
Whether you’re working on a small project or managing a large team, ESLint improves productivity, reduces bugs, and ensures adherence to coding standards.
Imagine you’re working in a fast-paced development team where multiple contributors write code daily. Each developer has their own style, preferences, and approaches to solving problems. This inconsistency can lead to challenges like unclear code structure, missed best practices, and time-consuming code reviews. Over time, these issues can affect code quality, team productivity, and even project delivery timelines. How do you ensure that everyone follows the same coding standards and best practices without adding manual overhead? This is where custom ESLint rules can make a significant difference. By automating the enforcement of your coding guidelines, you can maintain a consistent, high-quality codebase effortlessly.
Why writing custom rules?
While ESLint provides a rich set of default rules, there are often cases where your team or project requires specific guidelines to be enforced. Custom ESLint rules allow you to automate these requirements, offering several key benefits:
With ESLint and custom rules you can enforce your own rules and guidelines. This has several advantages:
- Consistency: Everyone in the team follows the same rules
- Quality: Enforce best practices
- Save time: Everything which is enforced in an automated fashion does not need to be checked manually in code reviews. Developers can focus on the important parts!
- Streamlined Onboarding: New team members can get up to speed faster as they see the rules enforced in their IDE
What we want to achieve
Take the following code example:

We want create a ESLint rule which forbids the usage implementing the OnDestroy interface and using the ngOnDestroy life cycle hook and give developers the hint that they rather should use DestroyRef instead.
Understanding the AST
The way we write our code is not the way how a machine reads and understands the code. For us the code is represented in a readable and nice way in our IDE. This works great for humans, but machines need a shape which they understand.
This shape is called an Abstract Syntax Tree (AST). The AST is a tree representation of the code. Each node in the tree represents a part of the code. ESLint uses the AST to traverse the code and apply rules to it.
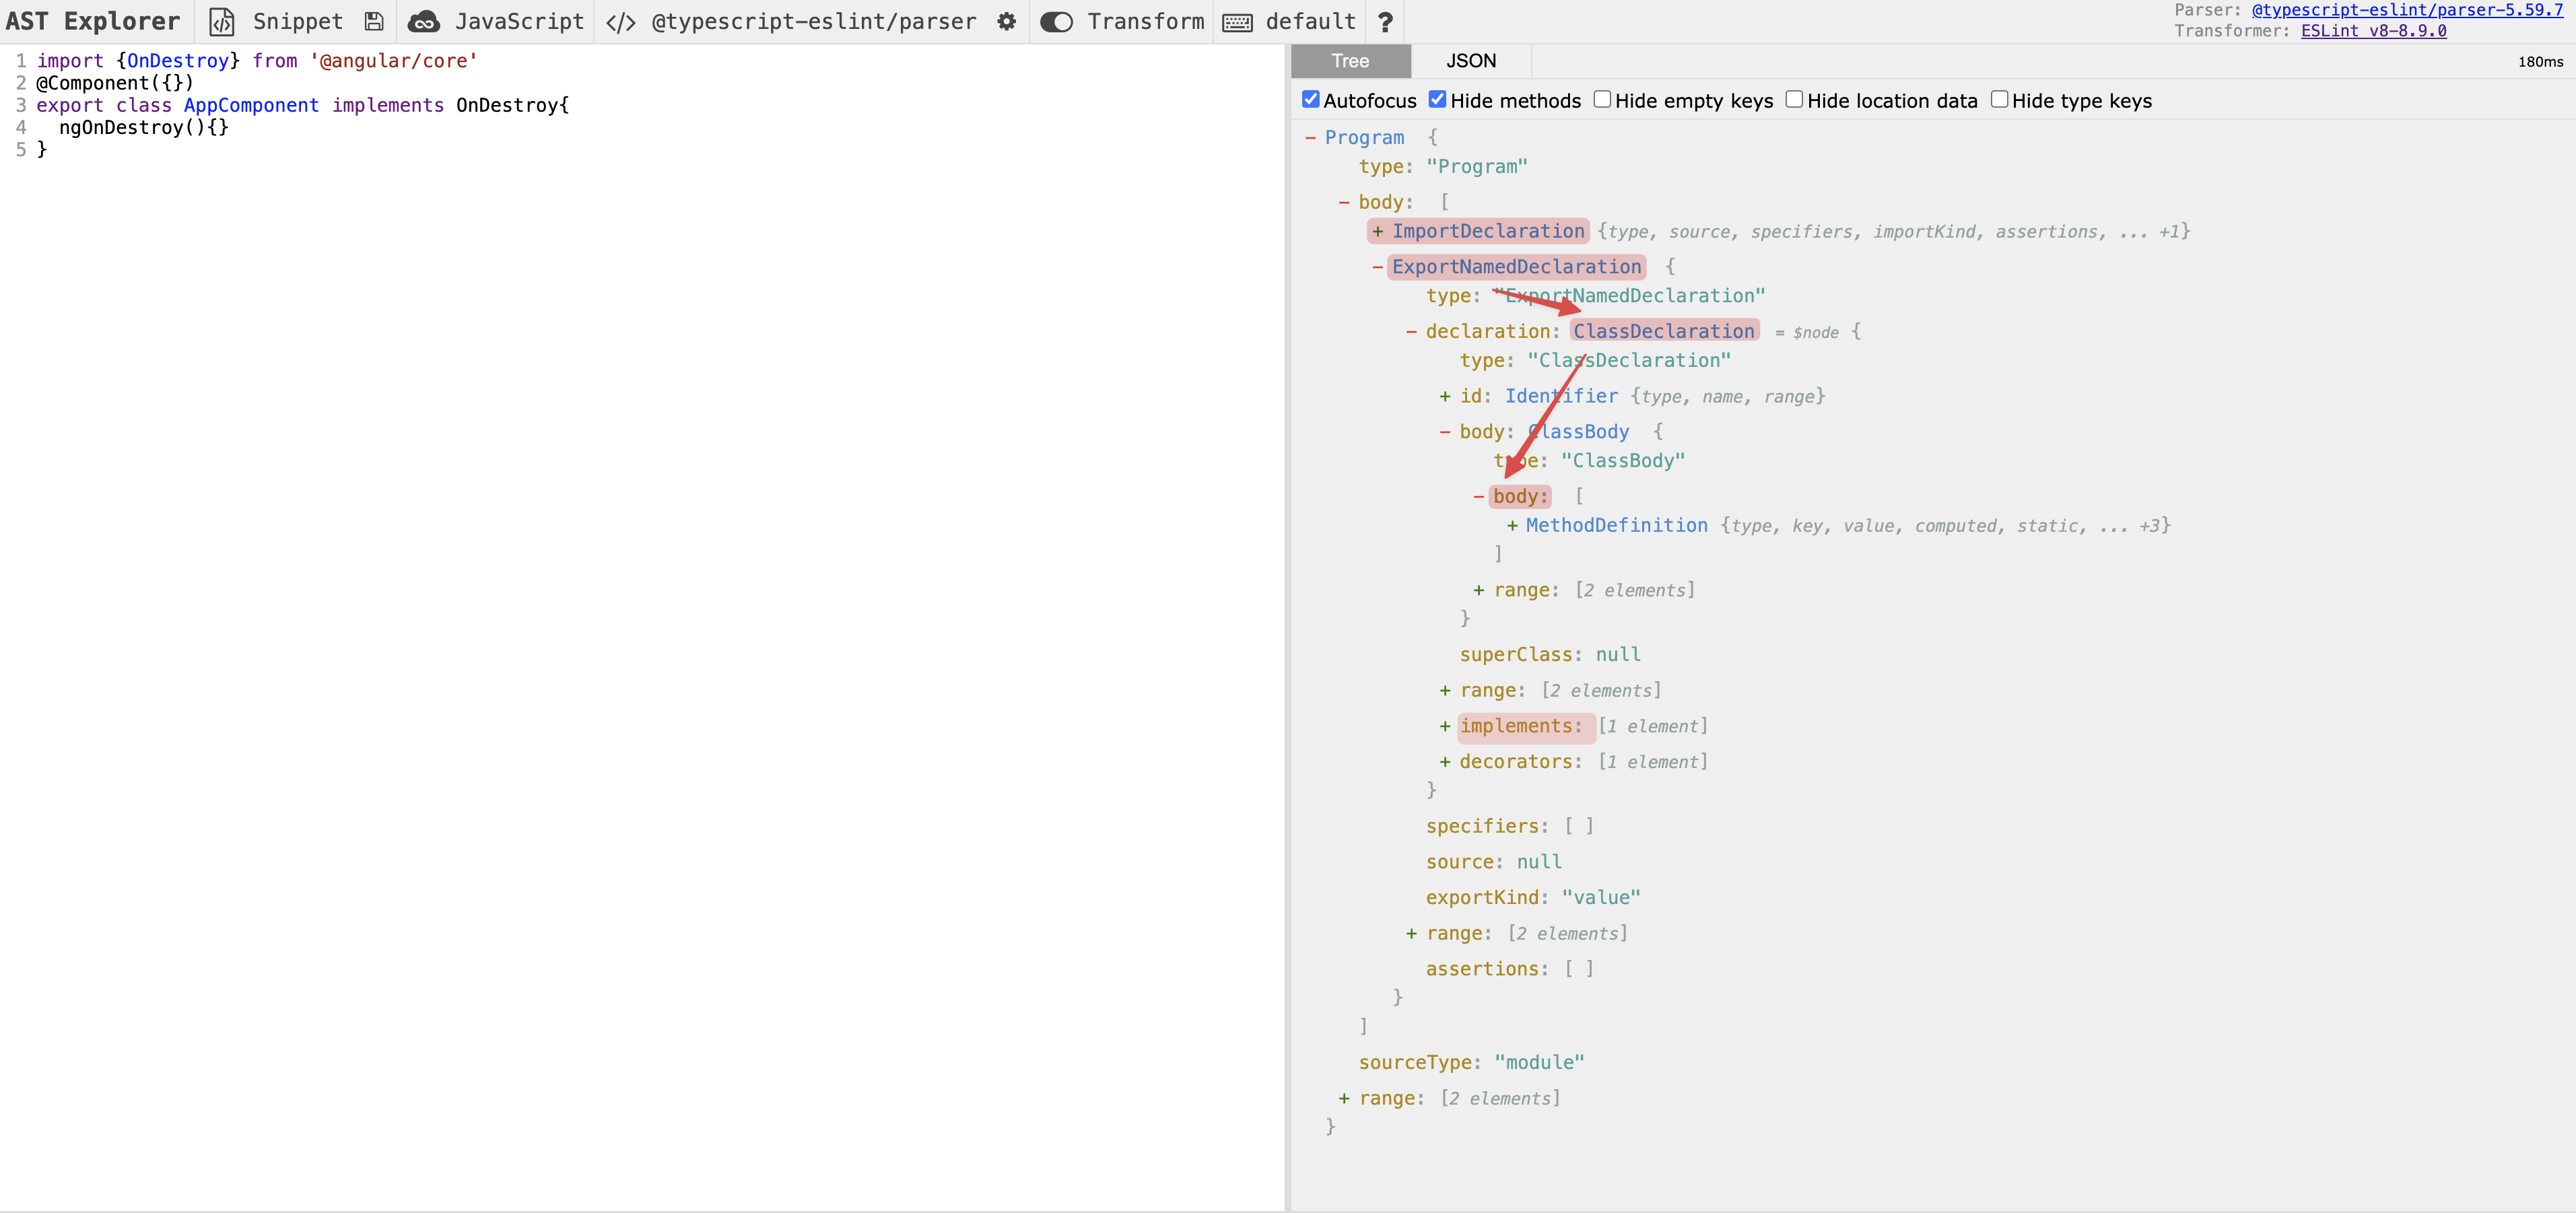
Let’s have a look at the AST of our code example:

On the left side we see here the code example and on the right side the AST representation of the code. There are a few things already highlighted, let’s break it down:
- We see the
Programnode which is the root node of the AST. This node has abody-node which actually contains the source code. - Within
bodya node of typeImportDeclarationis present. This means we have at least one import statement from a defined module (@angular/corein this case). - Finally there’s a
ExportNamedDeclarationnode which represents the export of theAppComponentclass.- Within this node we also find a
body.body-node which contains all the code within the declared class. Inside this node find aMethodDefintionfor each method ofAppComponent. As there’s only one method implemented, only one node is present:
- Inside
ExportNamedDeclarationwe can also see aimplementsproperty. As the name indicates, this node contains all interfaces which are implemented by theAppComponent:
- Within this node we also find a
With this knowledge we will be able to query for the correct nodes in our custom ESLint rule.
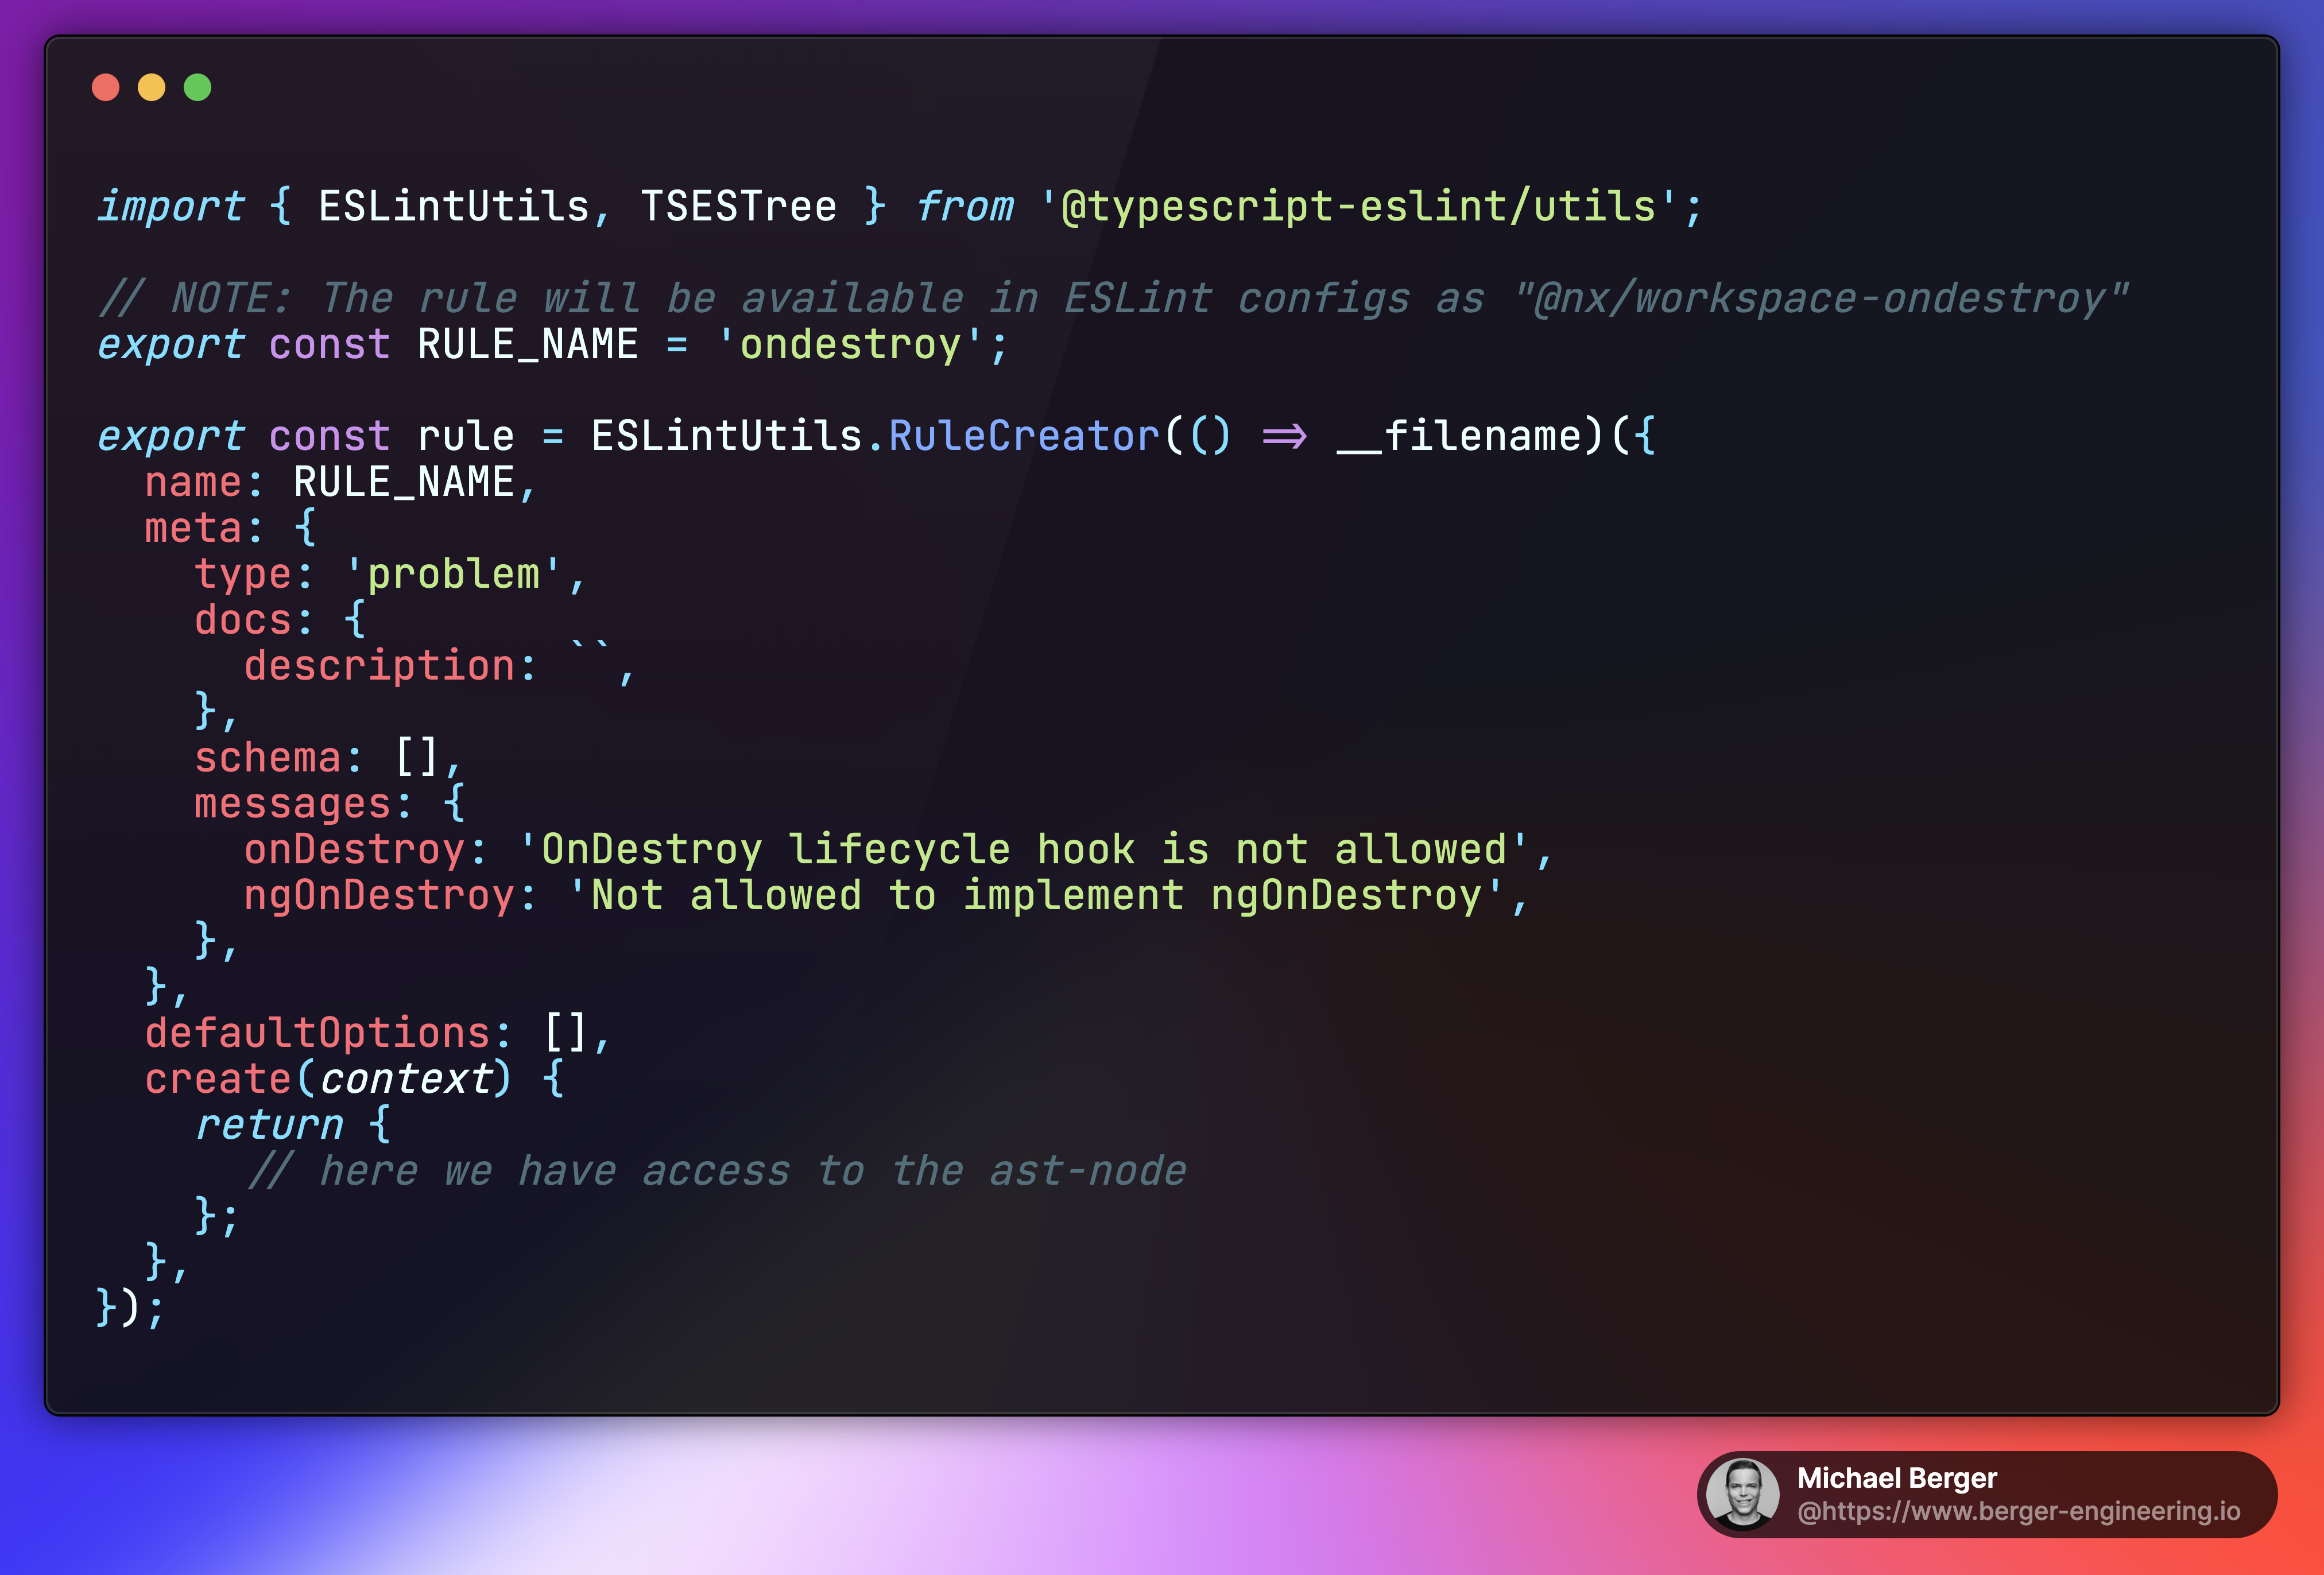
Writing the rule
For this example I am using a Nx-workspace. With the command nx g @nx/eslint:workspace-rule my-custom-rule we can scaffold a new ESLint rule:

The result
The final implementation looks like:

Applying the rule
To activate the rule you only need to add "@nx/workspace-ondestroy": "error" in the respective eslint-config file. Please note that the @nx/workspace--prefix is a convention coming from Nx.
Applying the rule will exactly highlight the part of the code which is violating the rule - mission completed!

Final Thoughts
Custom ESLint rules are a powerful tool for enforcing coding standards, enhancing code quality, and improving team productivity. By integrating these rules into your workflow, you can reduce manual effort in code reviews and focus on delivering value to your projects.
If you’re looking for more insights or guidance, feel free to reach out for a free consultation.
Good to know
In astexplorer.net it is important to set the right parser and transformer settings to get the correct AST representation.
